This short tutorial outlines how I made the level Bunker in Luola standard level pack. The technique is applicable to any caveflying game level making, but I have made no special considerations to possible palette constraints.
The level is made in two parts: the artwork that is visible to the player and the collisionmap used by the game engine. The artwork is fullcolor, but the collisionmap uses a palette.
It is also possible to combine the two, by using palette based artwork like most other caveflying games, but that technique is not covered here.
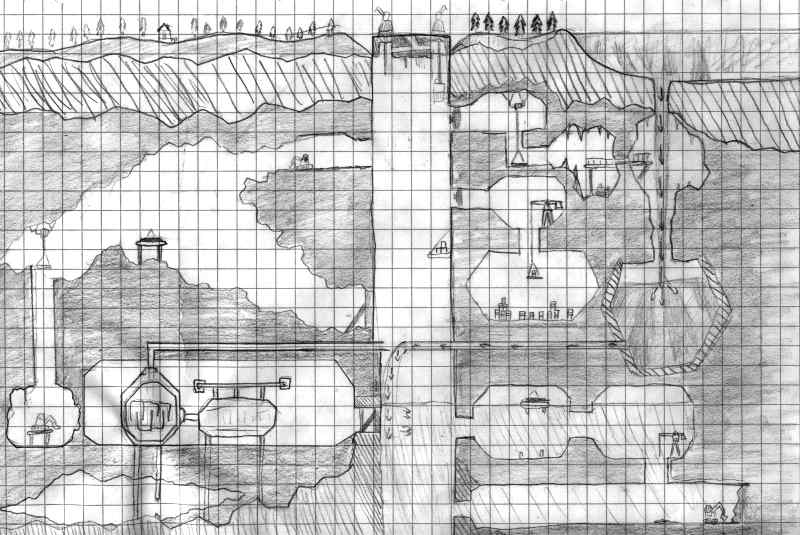
I started out by sketching the level on paper. Using notebook paper with
a grid is a good idea, as it helps keep the lines straight and things in scale.

After finishing the sketch, I started working on the actual level using The GIMP. To start out, I created a blank image with the same proportions as the sketch. I then turned turned on the grid and configured it to be roughly in scale with the one on paper.
First, I filled out the main areas of land, water and space. In the picture I have already started a bit on the next step.
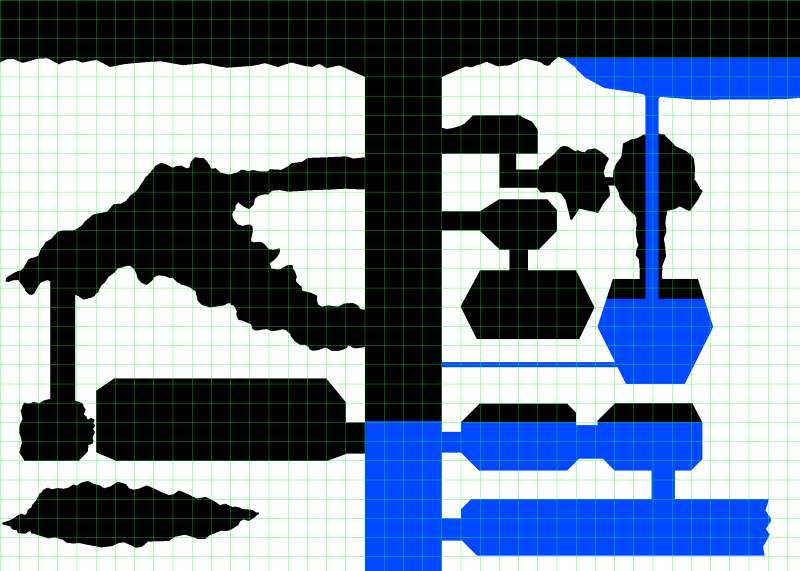
Now that the level had some terrain to work with, I started carving out the caverns. Using the grid as a guide, I carefully tried to maintain scale with the sketch.
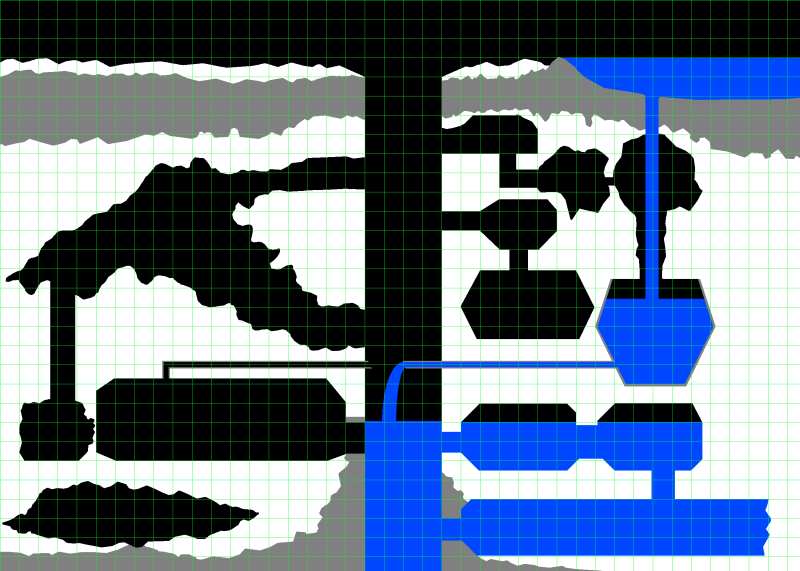
Next, I separated the indestructable terrain from regular ground.
A thing to note here is the waterline. To prevent holes in the water, underwater destructable terrain should be used. Also, because Luola doesn't have real flowing water, indestructable terrain is used to limit the underwater area.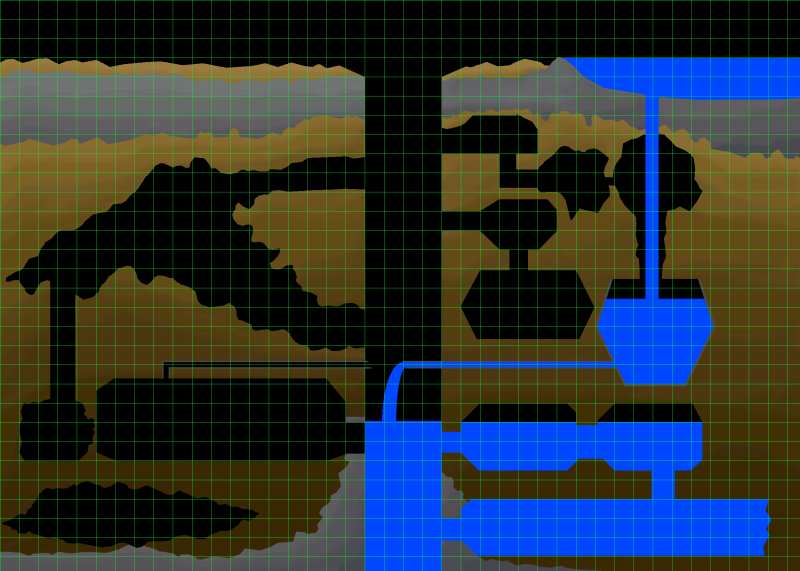
Now that the regular terrain (soft ground) and indestructable terrain (rock) are separate, it's time to add shading.
Altough it might be tempting to use the gradient tool, the best results are achieved by doing it manually with the brush tool. Using a large and soft brush, I started with a light color, then painted on layers of progressively darker colors the deeper I went.
As a finishing touch, I used GIMP's ditherize filter to reduce the number of colors for a retro look.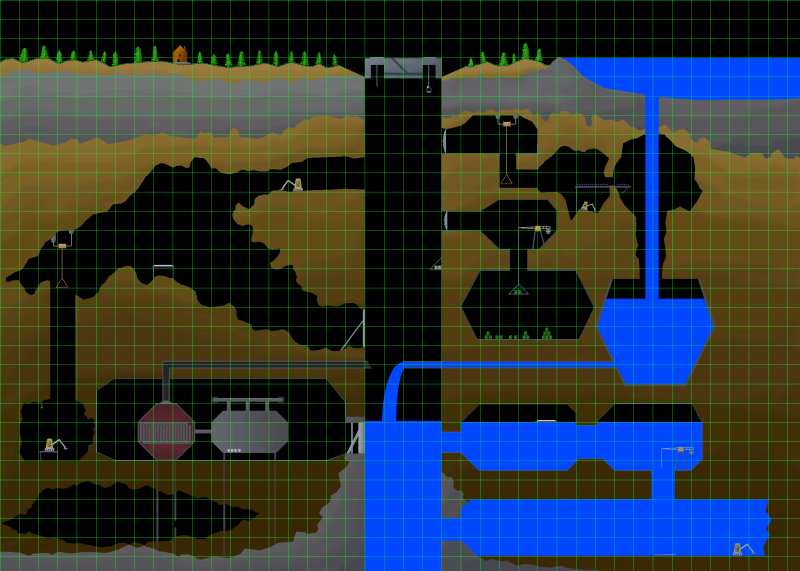
The final and most laborious step is to add all the details. The order in which the details are drawn in doesn't matter much.
When drawing small detail, there is really no other way than going through them pixel by pixel with the pen tool.
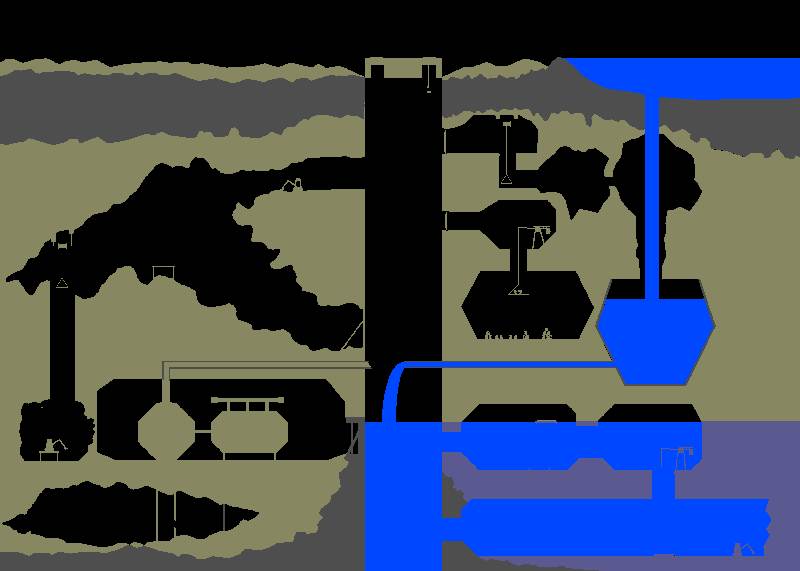
After the level artwork is finished, it's time to do the collisionmap.
The first thing to do is to create a new image that is the same size as the artwork. This image should use indexed colors.
Using the magic wand tool, I selected the destructable ground and some of the detail work as well and copied them to the clipboard. Then I added a new color to the collisionmap images colormap (color 0 is free space, color 1 is ground) and pasted the terrain in. I repeated this for indestructable terrain and water.
Also visible in the lower right corner of the picture is the underwater terrain.
Now all that is left to do is to add all the details.
Under the bases, I have used the base material terrain type that is either destructable or indestructable if bases are.
Waterfalls use water current terrain types.
Grass, trees and the house burn away, leaving some ash at the bottom.
The barrels and the reactor explode when shot at at.
Now that the level artwork and collisionmap are done, a configuration file is required to actually try the level out in Luola.
The [main] block is the only one required by Luola. Here we
set the names of the files that make up the level and also the name
that is visible to the player in the level selection screen.
[main]
artwork = bunker.png
collisionmap = bunker_col.png
name = Bunker
[end]
Luola 1.3.1 and newer support level thumbnails. To add one, insert thumbnail = bunker.thumb.png into the main block.
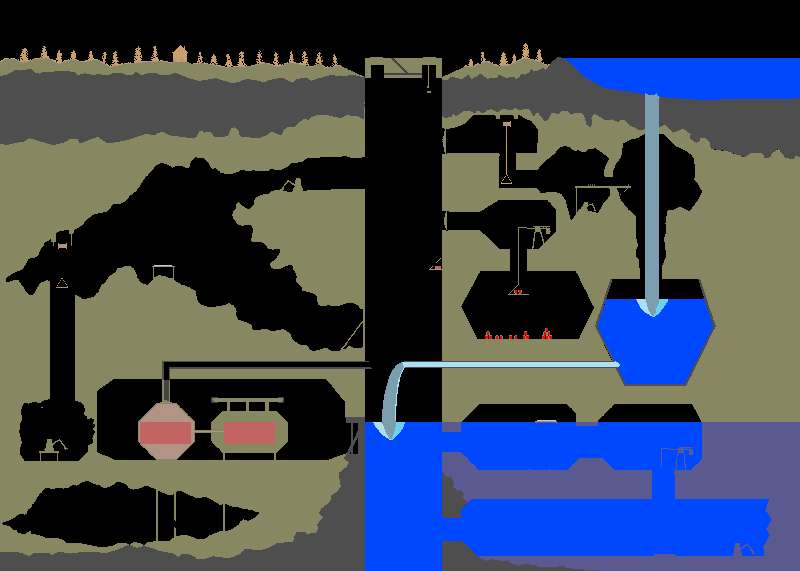
In the sketch of the level I had drawn gun turrets atop the main shaft. Rather than just draw mock turrets on the level, I decided to utilize a rarely used feature: manually placed objects.
[objects]
	# Turret 1
	[object]
	type = turret
	value = 1
	x = 1172
	y = 178
	[endsub]

	# Turret 2
	[object]
	type = turret
	value = 1
	x = 1332
	y = 178
	[endsub]
[end]
type = turret tells that the object I want is an autogun turret.
value = 1 means that the turret should fire grenades (values 0-2 mean regular, grenade and missile turrets.)
Refer to LEVELFILE for a complete list of supported objects.